
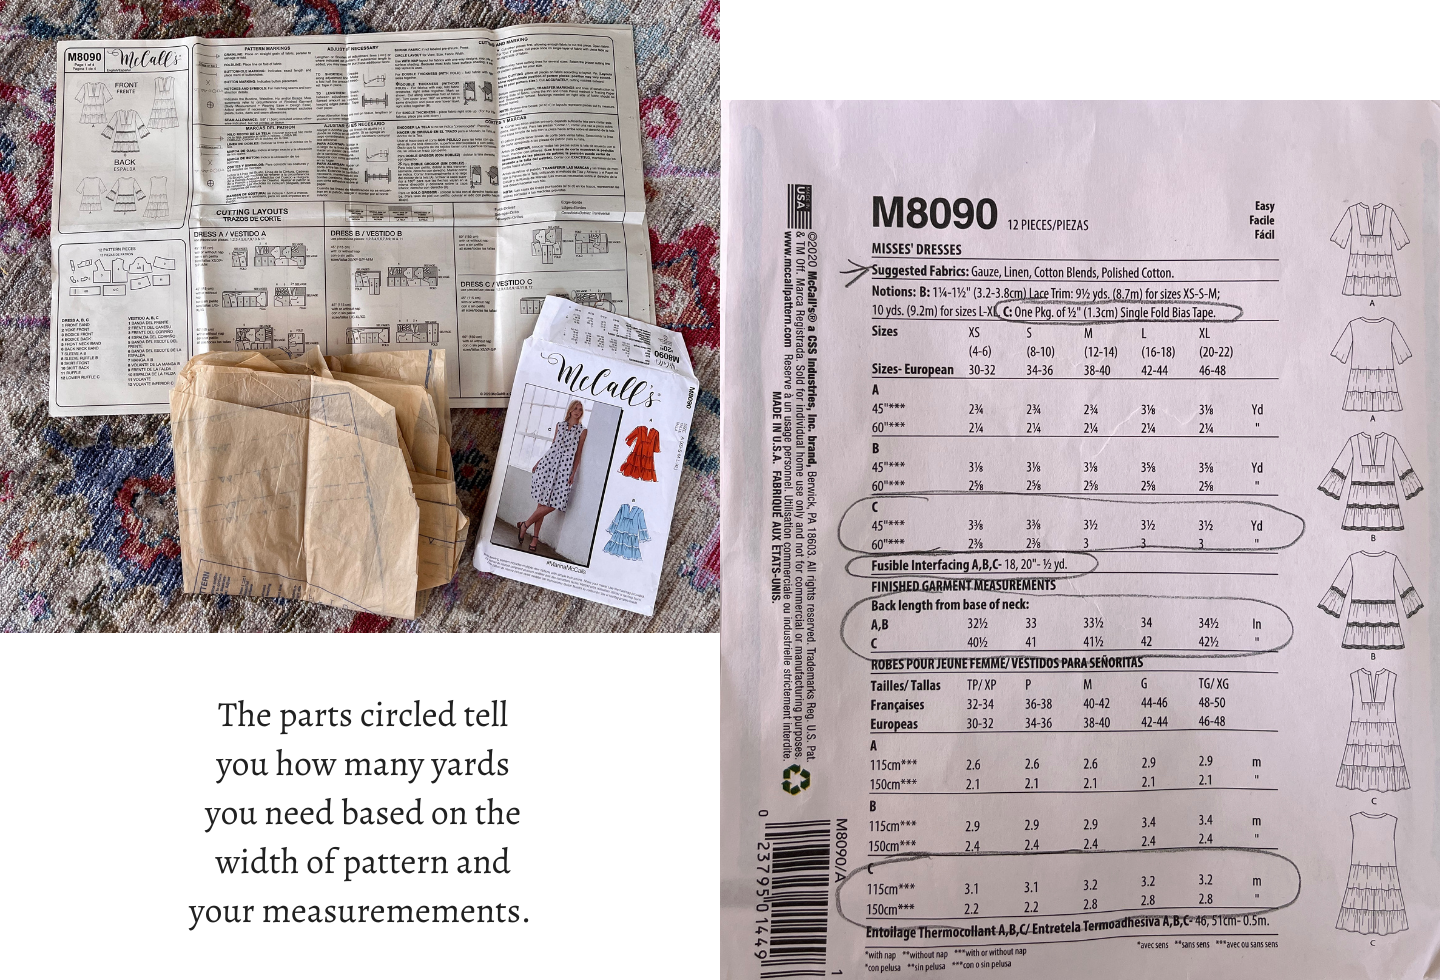
My First Attempt with “Tissue Paper” Pattern #M8090
Never again.
The two words I constantly muttered under my breath many many times as I was sewing this pattern. This pattern totally kicked my butt. I had to reread that pattern so many times and go line by line and still it was super confusing for me to understand what was going on. So on to YouTube I went and I found this super helpful video that helped tons - especially around the collar part.
I had two different fabrics that were lightweight and could work perfectly with this pattern. I got them from the clearance section at Joann’s so if I messed up it didn’t matter. That’s a tip my mom gave me from the start. Always look in the clearance section to see if you can snatch different types of fabric (linen, cotton, knit, etc) at a cheaper price. Even if you hate the pattern it’ll be a learning experience at a lower cost.
I pulled the two fabrics I had out and they were both 3 yards, however, one was 42 inches wide and another one was 60 inches wide. Looking at the back of the pattern will tell you exactly how much fabric you will need depending on the width of the fabric.
I ironed the entire fabric, cut out the patterns according to my size and pinned all the pieces. Then I cut everything out with scissors (MAKE SURE you do NOT cut you patterns with the same scissors that you cut fabric. This will help prevent your good scissors from becoming dull).
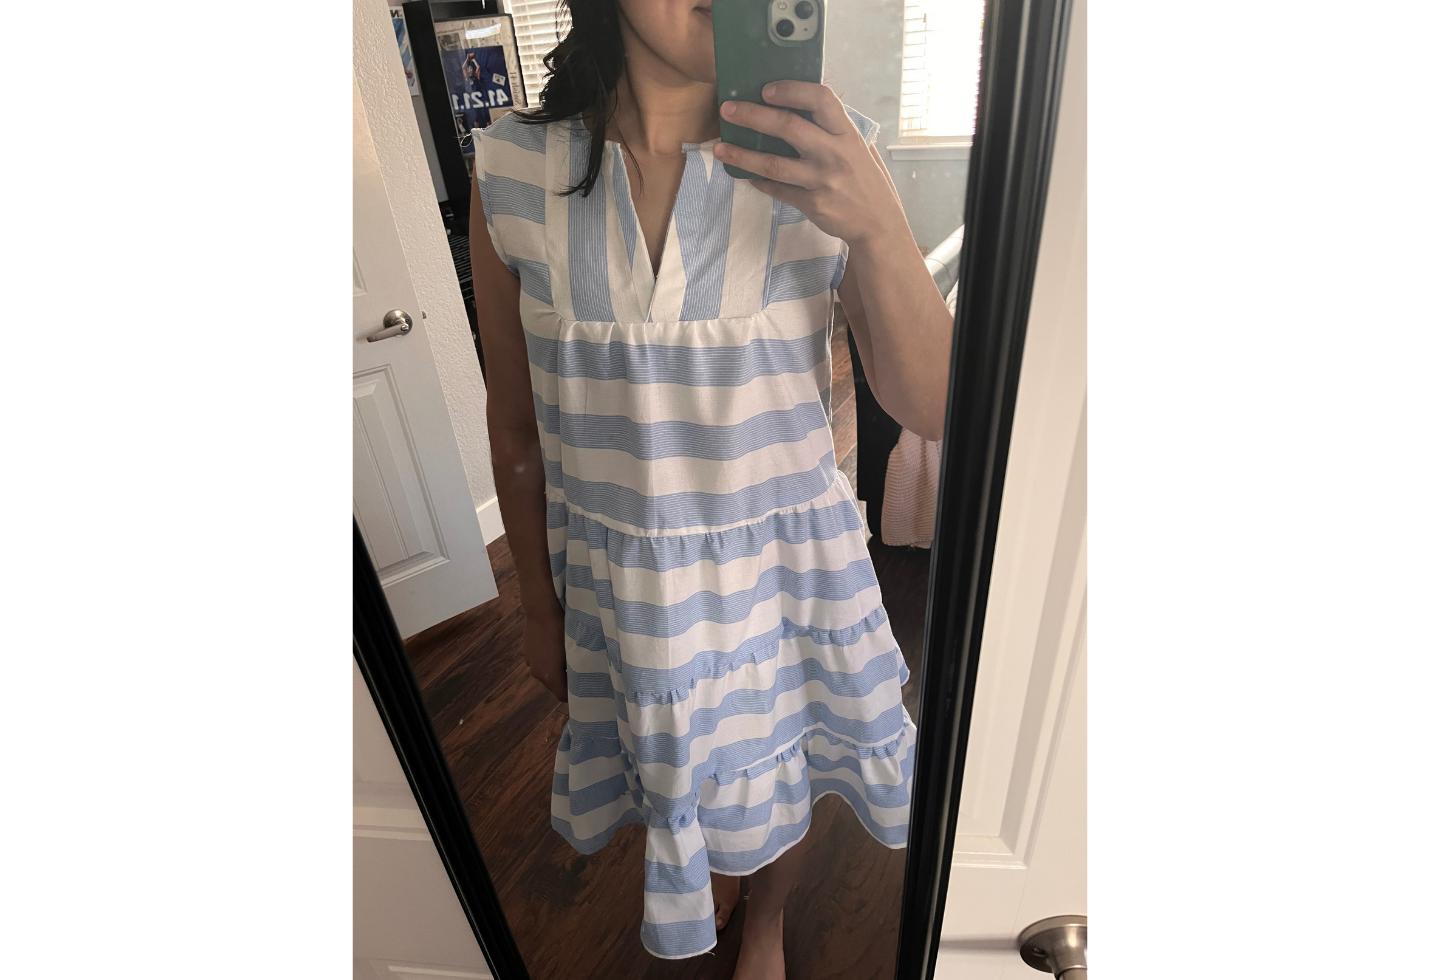
I think if the instructions were clearer and there were better pictures on the paper pattern, I think this would have been easier and I would have finished it quicker. The fabric I used also made it harder to hide the mistakes as well as gathering parts (ruffles) due to the stripes.
I loved the fabric choice in this pattern review (same dress) and if I ever redo this project I’ll definitely use a solid color.
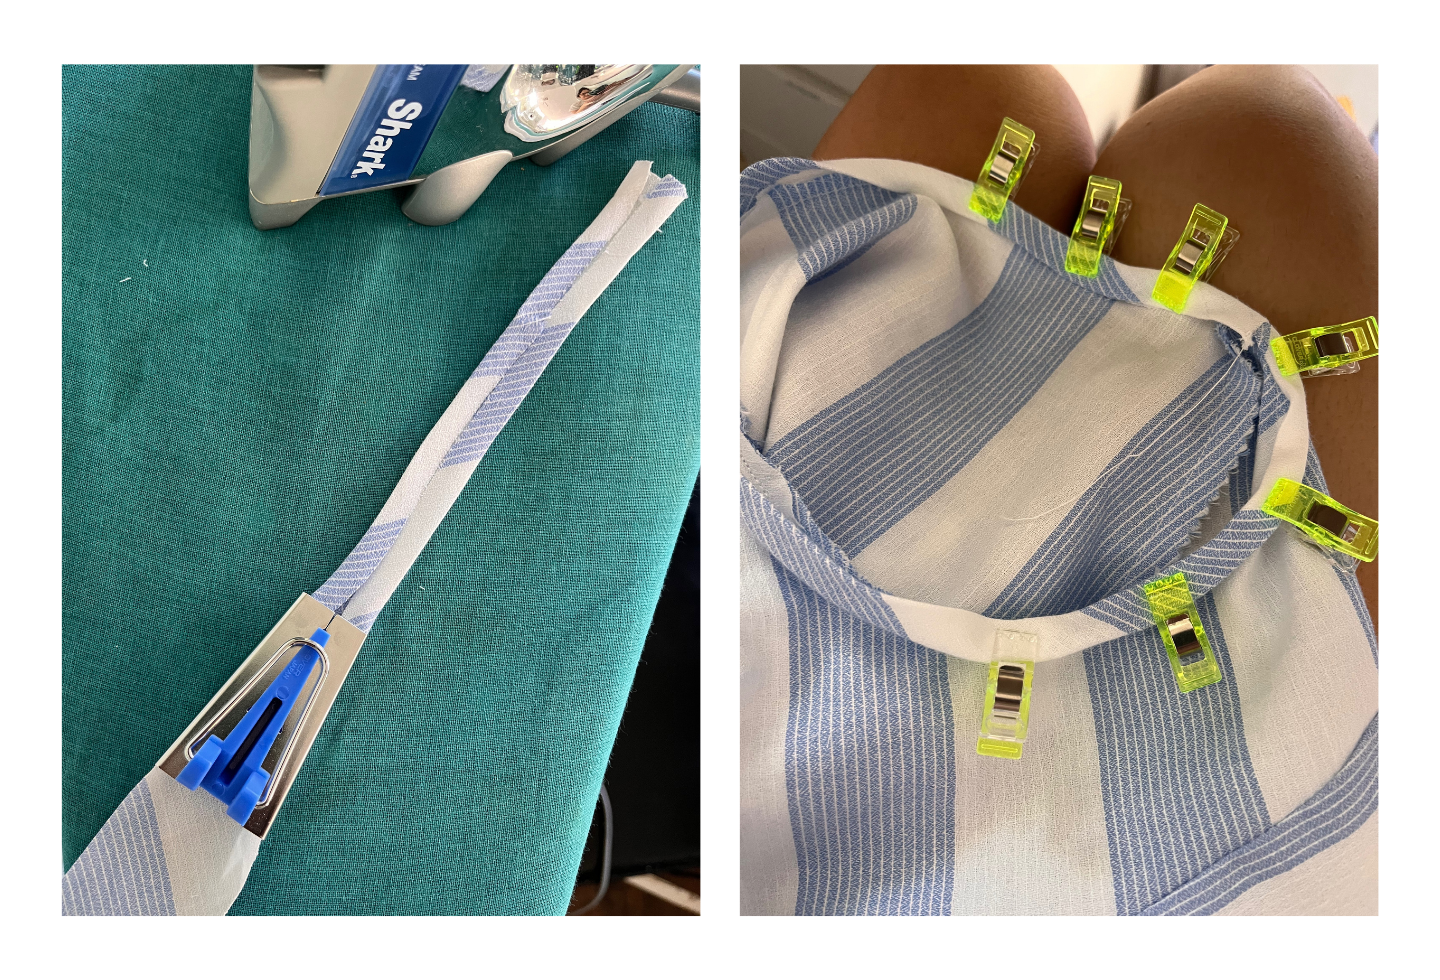
For the sleeves, I made my own bias tape using my bias tape maker - this video explains how to make bias tape super well. You definitely don’t need a bias tape maker but it’ll make it easier as you iron.
I’m also OBSESSED with Clover clips and use them for everything. It holds the fabric together in the same way pins would but in a sturdier way with the plus of you not poking yourself.
The gathering part was a pain especially since each layer kept getting bigger and there were a lot threads but watching some videos before doing it helped refresh my memory.
Here are some videos that show how to gather:
As always, with any experience comes many lessons and you grow a little bit more on your craft so I’m glad I bit the bullet and tried making something out of my comfort zone.
My next projects are to make a linen ruffle top for myself using this pattern and a boxy/peplum top that will match the top I made my daughter last month. Stay tuned for that!
xo,
barb